
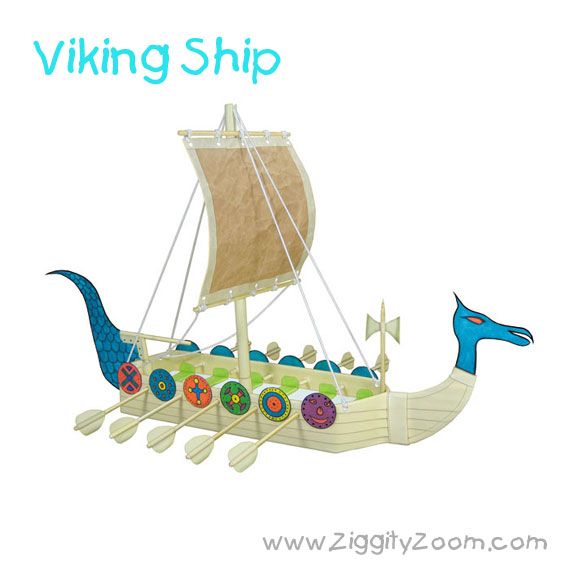
 Make a fun Viking Ship to make from recycled items. This incredible Viking ship is made entirely from recycled household items and it is a project worthy of idsplay in any child’s room or classroom. Can you believe it was made from a milk carton?
Items needed:
Here is a super fun project for kids to make out of recycled household items … a cool Viking Ship that kids will love to display in their room.
Always use your imagination and be creative when building these kids crafts or any others. It\’s your creation, so be inventive when looking for building supplies — you just may be surprised! When building your project, experiment with new and different ways of putting it together. The most important thing is to have fun!
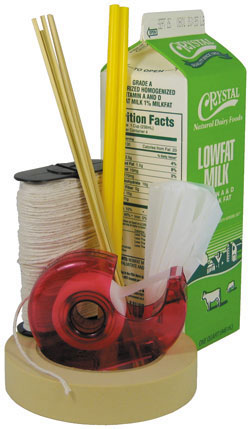
Supplies you will Need:
- 1 Quart or Bigger Carton
- 1 Straw & 12 Skewers
- Regular Masking Tape
- String or Thread
- Paper Bag
Instructions:
| 1. Cutting Your Carton |
|
Place the carton down on a surface with the open side facing up. Using a ruler, measure and mark halfway points at each corner, like you see here. Next, use the ruler to draw a straight line from point to point all the way around the carton. By cutting on this line, you will create a perfectly even boat hull. Now cut your milk carton in half.
|
| 2. Cutting the Dragon Head |
| Simply draw out a dragon bow head that you like on a piece of chipboard, cardboard, or posterboard. You can use an old cereal box or even the other half of your milk carton. Next, cut it out and tape it to the front of your new viking ship. |
| 3. Taping the Carton |
| Start the first row of tape at the bottom. Tape your carton all the way around, leaving about an inch of excess on the front. Add two or three first row layers, until you no longer see through to any printing on the carton. Continue adding layers of tape about 1/4-inch up from the bottom of the layer below. I like to add two layers of tape for each taped row, ensuring that you will not see through to the printing on the milk carton. This also makes it much stronger. |
| 4. Finish the Carton |
| Finish up by carefully folding the top row of tape over and into the inside of the hull. Then cut of the excess tape that was left out over the front by cutting along the edge of your dragon’s head. |
| 5. Building a Rudder |
| Simply draw out a dragon’s tail rudder you like on a piece of chipboard, cardboard, or posterboard. Then cut it out and tape it onto the stern (end) of your viking ship. Making a rudder that moves is more difficult than it looks, but you can still do it! Here’s how I made mine. Take a close look at the picture below and follow these steps:
|
| 6. Build and rig your Mast |
| I like to use straws for my masts. However, you can use just about anything, like a stick, or a pen or pencil. Straws work the best. Start out by covering two straws with tape. This makes them look like real wooden masts.Another great tip that will make rigging your boat easier is to carefully cut small slots at the top of your mast. If you aren’t using a mast with a flat end (like a pencil or a chopstick) you can wrap the end in tape, and once it’s thick enough you can cut out the slots. |
| 7. Finish rigging your Mast |
| The more time you spend on adding string for your rigging, the more realistic your viking ship will look. I like to start off by making holes at the corners and a few more on each side of the viking ship’s hull. Use a hole punch, and add holes around the edges of your hull. Try to space the holes as evenly as possible if you can.Then, tie a long piece of string to one of the corner holes you just punched. Next, run it up and over the mast, laying through your mast slots. Then pull it down, tying it to the opposite corner. Continue this, going from corner to corner. The most important thing is to use your imagination and be creative! |
| 8. Making your SailCut a 5-inch square from a brown paper bag. Place a piece of tape along one edge, using only half of the width of tape. Gently fold the other half over the back side. Trim any excess tape and repeat this step on all sides. I punched holes across the top of my sail and carefully tied it to a 5-inch skewer, also doing the same at the bottom. If you would like, simply tape your sail to the skewers. Install your sail by taping or tying it onto the mast. |
9. Making the Oars
| Cut ten 5-inch pieces from your skewers or sticks. Fold some tape over and onto itself at the end of each piece. Then cut the tape so each one looks like a paddle. Carefully measure and make five small holes evenly spaced across each side of your ship. The install your paddles. Your Vikings will definitely want to use these when they run out of wind while sailing the high seas of your living room. |
| 10. Finishing TouchesYou can add colored shields to the sides of your Viking Ship, flags or any cool thing you can think of. It’s your project, so be creative and always use your imagination. The most important thing is to have fun! |
For additional family crafts and other activities check out ZiggityZoom craft projects.
Additional Kids Crafts and family Activities.