
DIY Paper Mache Bowl Project
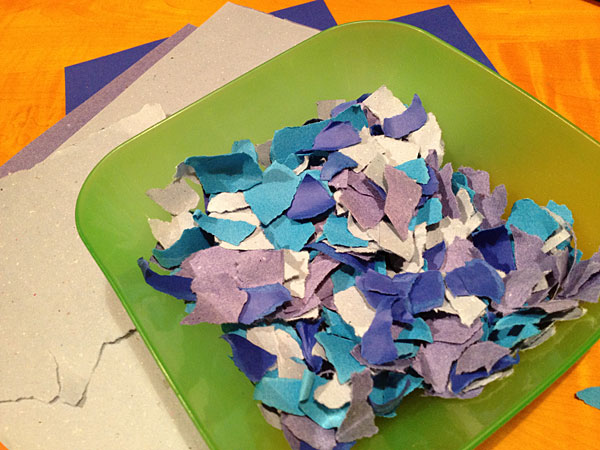
Let’s make artsy paper bowls … that’s what I said recently to my two young granddaughters. None of us had ever made paper before so it was a learning experience. What fun though. We started by tearing paper sheets, both colored and natural shades, into small squares about half an inch wide. Considering that the paper will be compressed and made into pulp, you need a lot of torn paper to make one bowl. We also tore up some egg cartons after sterilizing them in the microwave for about a minute.
The longest part of this procedure is the drying process, which takes a few days. You can speed up the process by using a hairdryer, but we chose to let ours air-dry, some times indoors and sometimes outdoors in the sun. The kids enjoyed mixing and mashing the paper and also using their imaginations to decorate their paper bowls. Follow along with our tutorial to learn how to make your own paper bowl.
What You Need:
- Torn paper
- Water
- Wallpaper paste or White Glue
- Paint (optional)
- Cardboard Base (optional)
- Electric Blender
- Colander
- Muslin or old t-shirt
- Bowl to use for form
- Beads, feathers, jewels, etc.
What to Do:
- Tear paper into small squares until you have a small bowl filled with paper. These can be colored or not, depending on what you have. You can always paint the bowls when they are dry.
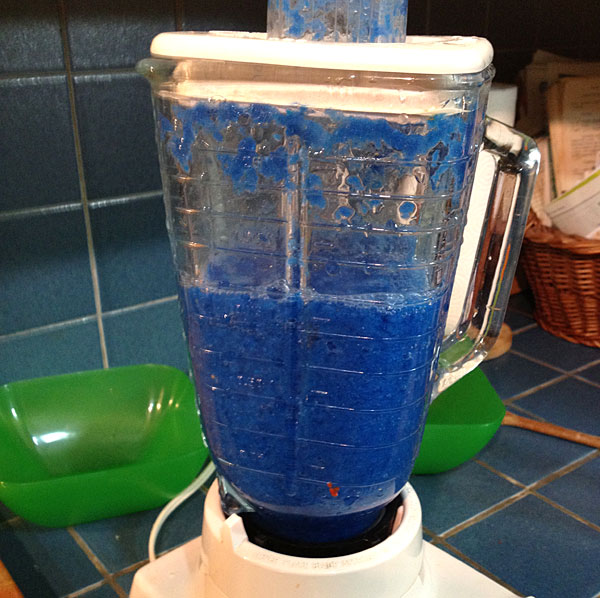
- For each bowl to be made, put torn paper in blender and fill with water. Blend until you have a nice thick pulp.
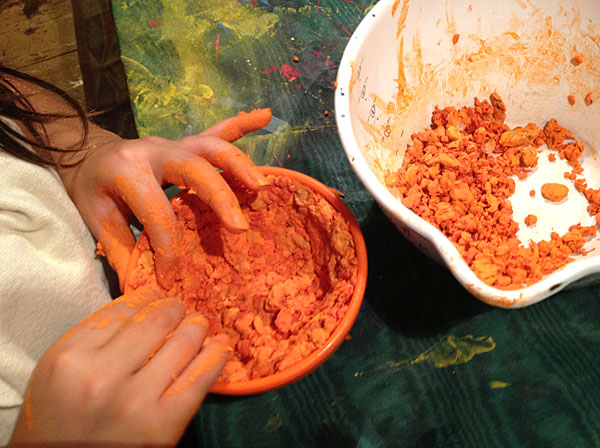
- Pour pulpy mixture into colander, lined with the muslin. Drain excess water. Now, squeeze water from pulp by hand but don’t make it too dry.
- Put paper pulp in a large bowl and add either 1/2 cup wallpaper paste or about 1/4 cup of white glue. Add paint for color, if desired. Mix and mash together with your hands until all is well blended.
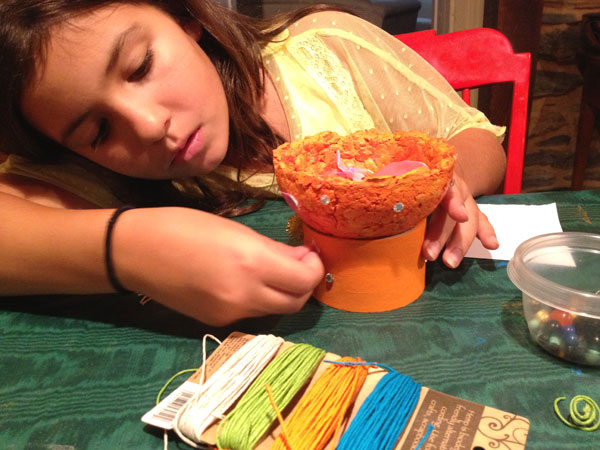
- Spread a thin layer of vegetable oil on the inside of your bowl mold. Then press the pulp inside the bowl to shape your paper bowl. Press together as uniformly as possible, making sure there are no openings/cracks.
- Set the bowl aside to dry very well. this can take several days, depending on the thickness of your bowl. Once the paper bowl has shrunk and pulled apart from the sides, you can now, carefully, turn the bowl upside down to remove it. Let it air-dry upside down so that it get completely dry from the inside out.
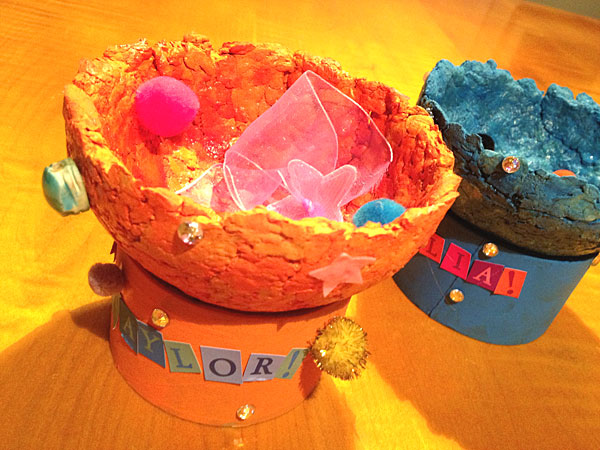
- If your bowl seems very fragile, paint a thin layer of white glue on the inside of the bowl and let dry. When dry, turn upside down and paint the outside with a layer of white glue. Let dry completely. This will give your bowl a nice sheen and make it more sturdy.
- If you decide to add a base, you can use old tubes from duct tape, or something similar. Paint the base and let it dry. Attach the base with duct tape from underneath.
- Now you’re ready to decorate your paper bowl. Use your imagination. Add beads, pompoms, twine, glitter, jewels and feathers. Or paint it decoratively.
 By Sharon Pierce McCullough